To delete your entire blog, just go to Settings | Basic:

At this point, make absolutely sure that you are on the right blog and that you want to permanently remove it from your account. Then click Delete This Blog: and confirm by clicking OK

To delete your entire blog, just go to Settings | Basic:
At this point, make absolutely sure that you are on the right blog and that you want to permanently remove it from your account. Then click Delete This Blog: and confirm by clicking OK
The blogosphere is a big and busy world with over 100 million blogs and growing. How do you attract visitors to your blog? Follow these simple tips to drive traffic to your blog.
Frequently updating your blog with useful content is the first step to building your blog's audience. The content you write is what will keep readers coming back for more. Make sure you have something meaningful to say to them and say it often to maintain their interest and keep them loyal.
Furthermore, post frequently to increase the number of chances you have for your blog's content to be noticed by search engines such as Google or Technorati.
Get on the radar screen for the popular search engines such as Google and Yahoo! by submitting your blog's URL to them. Most search engines provide a 'Submit' link (or something similar) to notify the search engine of your new blog, so those search engines will crawl it and include your pages in their results.
It's important to understand that simply submitting your blog to search engines doesn't mean your pages will appear at the top of a Google search results screen, but at least your blog will be included and will have the chance of being picked up by a search engine.
By adding links to sites you like in your blogroll, the owners of those blogs will find your blog and will be likely to add a reciprocal link in their blogrolls. It's an easy way to get the link to your blog in front of many readers on other blogs. The hope is that some of those readers will click on the link to your blog on the other blogs' blogrolls and find your content interesting and enjoyable turning them into loyal readers.
Commenting is a simple and essential tool to increase your blog's traffic. First, respond to comments left on your blog to show your readers that you value their opinions and draw them into a two-way conversation. This will increase reader loyalty.
Second, leave comments on other blogs to drive new traffic. Make sure you leave your blog's URL in your comment, so you create a link back to your own blog. Many people will read the comments left on a blog post. If they read a particularly interesting comment, they are highly likely to click on the link to visit the commentor's website. It's important to make sure you leave meaningful comments that are likely to invite people to click on your link to read more.
Setting up an RSS feed button on your blog makes it easy for your loyal readers to not just read your blog but also know when you publish new content.
Links are one of the most powerful parts of your blog. Not only are links noticed by search engines, but they also act as a tap on the shoulder to other bloggers who can easily identify who is linking to their sites. Linking helps to get you noticed by other bloggers who are likely to investigate the sites that are linking to them. This may lead them to become new readers of your blog or to add links to your blog from theirs.
You can take links to other blogs a step further by leaving a trackback on the other blog to let them know you've linked to them. Blogs that allow trackbacks will include a link back to your blog in the comments section of the post that you originally linked to. People do click on trackback links!
It takes a few extra seconds to add tags to each of your blog posts, but it's worth the time in terms of the additional traffic tags can drive to your blog. Tags (like links) are easily noticed by search engines. They're also key to helping readers find your blog when they perform searches on popular blog search engines such as Technorati.
Taking the time to submit your best posts to social bookmarking sites such as Digg, StumbleUpon, Reddit and more can be a simple way to quickly boost traffic to your blog.
When you write your blog posts and pages, remember to optimize your pages for search engines to find them. Include relevant keywords and links but don't overload your posts with too many relevant keywords or completely irrelevant keywords. Doing so can be considered spamming and could have negative results such as your blog being removed from Google's search entirely.
Images don't just make your blog look pretty, they also help people find you in search engine listings. People often use the image search options offered by Google, Yahoo! and other search engines, and naming your images with search engine optimization in mind can easily boost your traffic.
There are many factors that impact the level of revenue generated from a blog using the Google Adsense program. Books have been written explaining expert strategies for Adsense - However for the purposes of this series we’ve boiled it all down into four elements that we believe impact your Adsense earning capacity the most. Speaking in general terms here is a simple equation that illustrates how the factors each contribute to Adsense Revenue.
Adsense Revenue = Traffic Levels + High Paying Ads + Relevant Ads + Optimally Positioned and Designed Ads
Its not Rocket Science. Each of the above four elements contribute directly to the total revenue that your Adsense Ads will produce. Don’t just work on one of them though because if any one is weak it will hold your potential earnings back. Lets break each factor down….
Traffic Levels - The more people that see you Adsense Ads, the more likelihood there is that someone will click on them. As I examine the statistics provided by Adsense that report my daily earnings I notice that my earnings in the past 8 months have increased considerably as my total page impressions have increased. For example earlier in the week when Slashdot linked up to this post I had an influx of 50,000 visitors in 24 hours to my blog - it doesn’t take a genius to work out what this did to my Adsense earnings that day! Work on increasing your traffic levels and you should see an increase in your Adsense Revenue.
High Paying Ads - Once again I’m stating the obvious, but if the content you provide on your blog attracts high paying ads you’re going to do significantly better. For example it has been documented that the PVR Blog is doing pretty well when it comes to high Adsense earnings - the secret of its success is partly due to it being served with ads that are high paying. The topic of the PVR blog is, as you’d expect, PVR technology including TiVo, Replay TV etc. This is cutting edge technology and therefore advertisers are willing to pay top dollar to get their products and services out there! In comparison if a person was to start a blog on ‘toothpicks’ I suspect the ads are not likely to pay very much. It would take very high traffic levels to earn as much from a toothpick blog as it would the PVR blog.
Relevant Ads - A second reason the PVR Blog is successful is that it servers relevant ads. To put it simply people looking for information on PVR technology are confronted by Adsense ads for PVR technology. I recently visited a blog that was having trouble getting relevant ads - they had a blog on Tourist destinations in Australia - but unfortunately they were getting Adsense ads for remote control cars. You can guess what their revenue was like. Increase the relevancy of your Ads to your content and you are one step closer to increasing your Adsense revenue.
Optimally Positioned and Designed Ads - One of the coolest things about the Adsense program is that they give you freedom in choosing the best position and color scheme for your ads. Just like in the wider world of advertising - positioning is a key element to an ads success. A Billboard positioned on a road where no one drives is not likely to get the same results as one positioned on a busy intersection. The position and design of your Adsense Ads is critical - if they are out of site they’ll never get clicked on.
Bringing them Together - The above four elements are in many ways pretty obvious when spelt out like this - the challenge comes to improving each to optimize Adsense revenue.
Your revenue will only grow as high as the weakest one of these factors on your blog. For example if you have high paying, relevant, well designed and positioned ads but no traffic you’ll not do well. Likewise if you have high traffic, high paying and relevant ads but they are poorly designed an in a position where they’ll never be seen - you’ll waste all your other hard work. Its not enough to work on one element.
How do we improve each? In the next four posts we’ll examine each area in turn and suggest a number of ways that you might try tweaking them to increase your revenue.
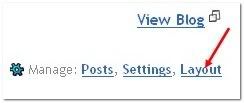
Sign in to your Blogger dashboard then click on the layout link in the Manage section, next to your blog name
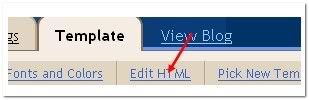
Select the “Edit HTML” tab at the top
Before installing the template, remember to backup your old template ! It is always the good practice, really!
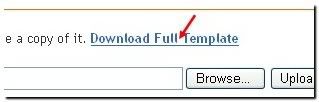
First, download the current template using the “Download Full Template” option
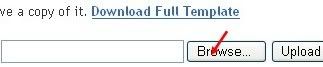
Next, upload the downloaded template using the Browse button
Save the changes and you are DONE.
If you are asked “Please confirm that the following widgets should be deleted. All the widgets’ configuration data will be lost“, just Click on CONFIRM & SAVE button (as shown in the screenshot below)
That’s it! Now you have sucessfully installed the xml blogger template in your blog. Start blogging ![]()
![]() This article was written to provide a step-by-step guide on how to correctly apply a new xml Blogger template to your blog. This process can be tricky depending on several factors (quality of the code in the new template, your existing widgets, etc) so you need to be careful when changing your template. Don’t worry though, just follow our step-by-step instructions below and we’ll hopefully get you through it without much pain.
This article was written to provide a step-by-step guide on how to correctly apply a new xml Blogger template to your blog. This process can be tricky depending on several factors (quality of the code in the new template, your existing widgets, etc) so you need to be careful when changing your template. Don’t worry though, just follow our step-by-step instructions below and we’ll hopefully get you through it without much pain. ![]()
Many people make the same mistake when installing a new blogger template. Most problems when installing a new template are caused by the blogger widgets (Page Elements) that you’ve spent time setting up in your previous template. Almost all Blogger templates available for download on this site are in the new Blogger xml template format so if you’ve downloaded the template from us, it’s going to be much easier to follow our instructions.
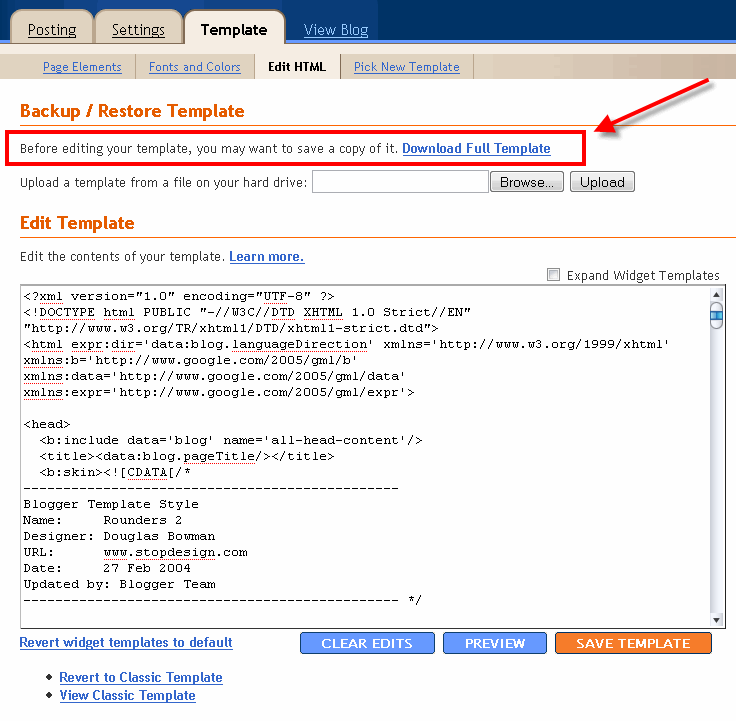 Backup your current Template just in case you make a mistake. This is very important so you can always go back (click on the screenshot to the left to see exactly how this is done). You’ll want to navigate to the “Template” => “Edit HTML” section of Blogger and then look for the “Before editing your template, you may want to save a copy of it. Download Full Template“. Click on the “Download Full Template” and save it somewhere easy to find later on your computer. We are not responsible for any mistakes you make in applying your new Blogger template. Once you have saved this .xml file onto your computer, move on to step #2.
 This next step isn’t necessary but I like to do it anyhow. Take a screenshot of your “Page Elements” page just so you know exactly what widgets (Page Elements) you had before applying the new template (an example of the exact page you should take a screenshot of is in the image to the left). If you blow away all your widgets and you don’t remember which ones you had, this screenshot will at least help you remember. If you’re unsure as to how to take a screenshot, then check out this quick tutorial (MS Windows).
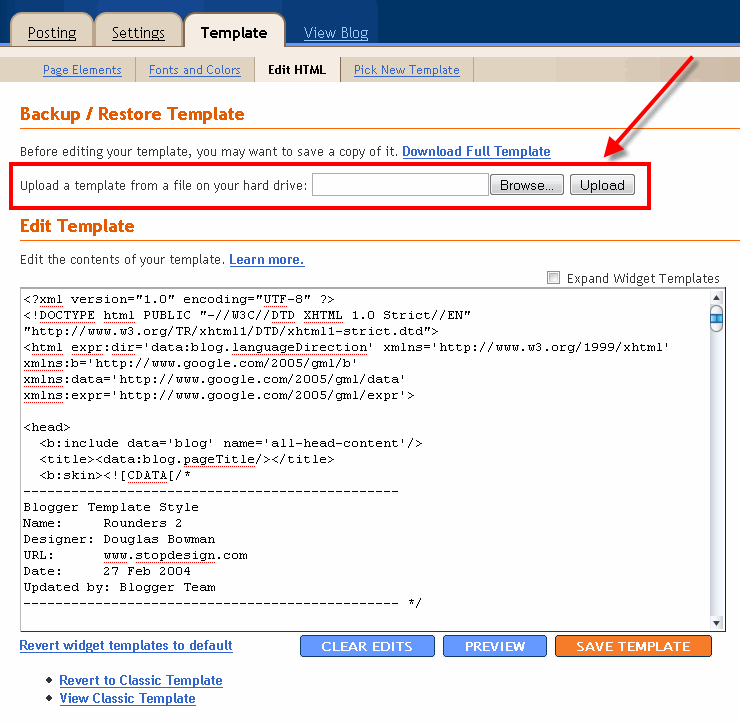 Now it’s time to upload the new Blogger template from your computer. You’ll want to navigate to the “Template” => “Edit HTML” section of Blogger and then look for the “Upload a template from a file on your hard drive:” text. To the right of that you’ll see two buttons. First, you’ll click on “Browse” and navigate to the new .xml Blogger template on your computer and click “Open”. Then you click on the “Upload” button and cross your fingers.
At this point Blogger is attempting to apply the new .xml Blogger template to your blog. After it’s done, you’ll get a message stating that the upload and new template was applied successfully (in that case you’re done!) or more likely in my case, you’ll get a red error message that states something like:
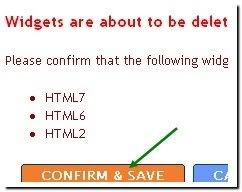
Please confirm that the following widgets should be deleted. All the widgets’ configuration data will be lost.
Now if you’re like me, you don’t want to lose all those widgets (Page Elements) you spent lots of time configuring and arranging on your blog. If you don’t care and really don’t have anything you’ll be upset losing, then go ahead and click on the “Confirm and Save” button that looks like this:
![]()
Just remember, that you’ll need to re-add any page elements that you had previously setup in your old template. If they were simple or just recently added then I’d recommend just re-adding them instead of having to follow the next steps. If you decide you want to keep your widgets (Page Elements) then write down (or take another screenshot) the list mentioned above that are going to be deleted. You’ll use this list later when we migrate over your widgets.
This process is going to take some careful cut and pasting within the template code so if you’re not comfortable doing this, then I’d recommend just ending on the previous step. First things first, click on the blue cancel button (you should still be on the previous step) that looks like this:
![]()
This will cancel out of the new Blogger template you were just trying to upload. Next, we’re going to essentially make a temporary placeholder for your widgets (Page Elements) within your current template. You should still be in the “Template” => “Edit HTML” section of Blogger so if you’re not, go back to that section.
You’re going to actually edit this template code now so pay close attention. Look for the following piece of code which is all the way at the bottom.